Installing high-flow filters seems easy, but small mistakes can cause big system failures. These errors lead to poor performance, unexpected downtime, and costly repairs you didn’t budget for.
The three most common installation mistakes are improper seating and alignment of the cartridge, failing to completely vent trapped air before operation, and incorrect handling of O-rings, which leads to leaks. Avoiding these simple errors ensures your system runs perfectly from the start.

Over my 10 years at Ecofiltrone, I’ve spent a lot of time on factory floors and at project sites. I’ve seen how these giant filters are made and how they are installed in real-world conditions. It’s not just about selling a product; it’s about making sure it works perfectly for you. I’ve learned that the best performance comes from paying attention to the small details during installation. Let me walk you through three common mistakes I’ve seen technicians make, so you can avoid them on your next project.
Is your filter cartridge seated and aligned correctly?
You just pushed the new filter cartridge in. But is it perfectly straight? A tiny tilt can cause major contamination by letting unfiltered water bypass the seal, defeating the purpose.
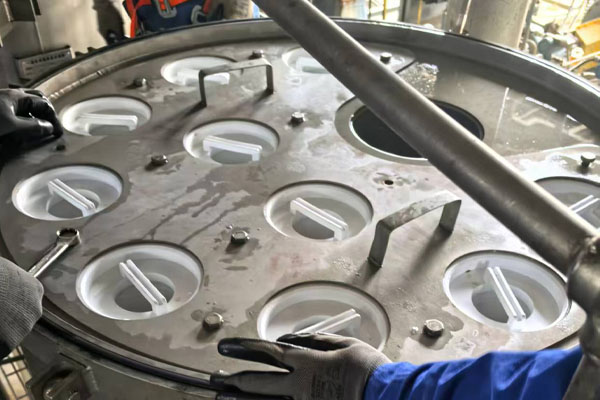
To install a cartridge correctly, guide it straight down onto the locator pipe. Apply firm, even pressure until you feel it click or seat securely. Look at it from all angles to confirm it is perfectly vertical with no gaps around the seal. This ensures a perfect seal.
![Close-up of a high-flow filter cartridge being perfectly aligned on its guide pipe]
I remember visiting a large water treatment plant in Shanghai. They were complaining about poor filtrate quality even after installing our new high-flow cartridges. I went to the site and asked the operator to show me how they did the installation. He inserted the cartridge quickly, but I noticed it was leaning slightly to one side. This tiny tilt created a small gap in the seal. Unfiltered water was bypassing the filter media completely. We reinstalled it, making sure it was perfectly perpendicular. The problem was solved instantly. Uneven force on the seal not only causes leaks but can also damage the end cap over time. It’s a simple check that saves a lot of trouble.
| Installation Step | Correct Method (Good Practice) | Incorrect Method (Common Mistake) |
|---|---|---|
| Insertion | Guide the cartridge vertically onto the pipe. | Pushing it in at an angle. |
| Seating | Apply even, downward pressure until a firm seat is felt. | Applying force unevenly or stopping before it’s fully seated. |
| Verification | Visually inspect for perpendicular alignment and no gaps. | Assuming it’s correct without a visual check. |
Did you forget to vent the air before sealing the housing?
The new filter is in, and the lid is sealed tight. You turn on the pump, but the flow rate is low. This is often caused by trapped air, a simple problem.
Trapped air, or "air resistance," creates back pressure that reduces flow and efficiency. Always vent the housing before full operation. Slowly fill it with water and open the vent valve on top until a solid stream of water flows out, confirming all air is gone.

This is probably the most common mistake I see, especially with new technicians. They are in a hurry to get the system back online. They forget that a 60-inch high-flow filter housing holds a lot of air. When you start the pump, this trapped air gets compressed at the top. It acts like a cushion, fighting against the incoming water flow. This "air lock" can dramatically reduce your system’s output and even cause water hammer, which can damage gauges and pipes. The solution is so simple. Every filter housing has a vent valve on the top lid. Just crack it open as the housing fills with water. You’ll hear the air hiss out. Once a steady stream of water comes out, you can close the valve and start the system. It’s a two-minute step that prevents hours of troubleshooting.
Step-by-Step Venting Checklist
- Ensure the outlet valve is closed and the inlet valve is slightly open.
- Locate the vent valve on the top of the filter housing.
- Slowly open the vent valve.
- Allow water to fill the housing, pushing the air out through the vent.
- Wait until a steady, bubble-free stream of water comes out of the vent.
- Close the vent valve securely.
- Now, you can fully open the inlet valve and then the outlet valve to begin operation.
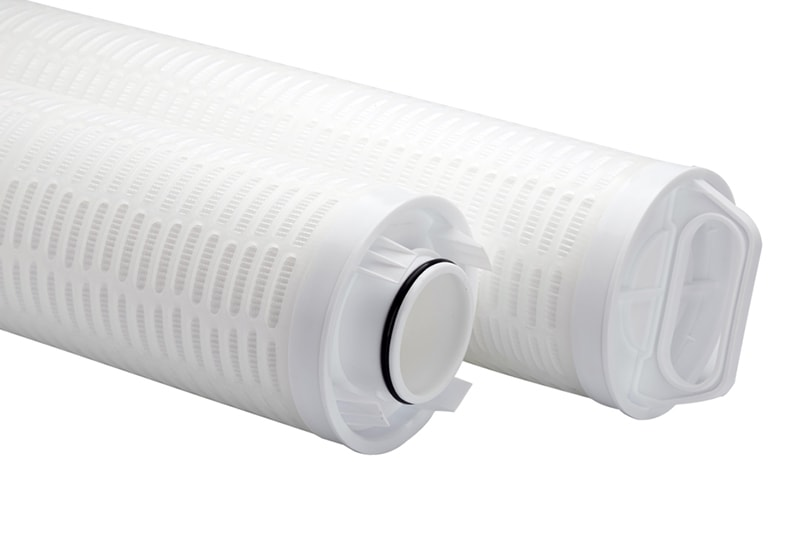
You’ve done everything right, but you still see a small, annoying drip from the housing lid. This tiny leak could be caused by an improperly installed or damaged O-ring.
An O-ring needs to be clean, undamaged, and properly lubricated to create a perfect seal. Before installing, always inspect it for cracks. Apply a thin layer of a compatible lubricant like silicone or glycerin to prevent it from twisting or tearing when you tighten the lid.

At Ecofiltrone, we pay close attention to the quality of our O-rings, but their performance depends entirely on proper installation. I’ve seen operators use a screwdriver to pry an old O-ring out, scratching the groove in the process. This scratch creates a path for water to leak, no matter how good the new O-ring is. Another issue is not using lubricant. A dry O-ring can get pinched or twisted as you tighten the housing lid. This creates a weak spot in the seal that will eventually fail. Using a small amount of system-compatible lubricant allows the O-ring to slide into place smoothly and create an even, tight seal. It also makes the next filter change much easier. This small detail separates a professional installation from an amateur one.
| O-Ring Installation | The Right Way (Do) | The Wrong Way (Don’t) |
|---|---|---|
| Inspection | Always inspect the new O-ring for nicks, cuts, or defects. | Assume the new O-ring is perfect out of the bag. |
| Groove Check | Clean the O-ring groove and check for scratches. | Ignore debris or damage in the sealing groove. |
| Lubrication | Apply a thin, even coat of a compatible lubricant (e.g., glycerin). | Install the O-ring dry or use an incompatible grease. |
| Placement | Seat the O-ring carefully without twisting it. | Force or stretch the O-ring into place. |
Conclusion
Paying attention to these three small details—alignment, venting, and O-ring care—will ensure your high-flow filtration system performs reliably and efficiently from day one.